Everyone with a WordPress site needs to prioritize security. But without an SSL certificate, your site appears untrustworthy to visitors.
It’s the difference between your site URL beginning with HTTP vs. HTTPS–the additional S actually signifies the presence of the SSL certificate. (For an easy mnemonic, you can think of the S standing for “secure.”)
Adding an SSL and HTTPS to your WordPress site ensures users that the connection is secure and a third-party hacker or cybercriminal hasn’t hijacked the page. Web browsers will therefore see your site as trustworthy and allow users to access it.
Those users will know that it’s safe to browse, shop, and/or enter personal information, and they’ll be comfortable clicking through your pages.
In terms of site security, HTTPS is the bare minimum in today’s day and age. And as we just noted, the only way to achieve HTTPS is by adding an SSL certificate to your WordPress website.
If it’s your first time getting an SSL certificate and adding it to WordPress, it can feel a bit overwhelming or intimidating. But you’ve come to the right place—this guide will walk you through everything you need to know about adding HTTPS to WordPress.
5 Steps to Add SSL and HTTPS in WordPress
Throughout my career, I’ve owned and managed several different WordPress sites. As someone with lots of experience in this space, I’ve simplified the process to just five simple steps:
- Determine What Type of SSL Certificate You Need
- Get an SSL Certificate
- Install the SSL Certificate
- Verify the Installation
- Notify Google
The Good
Adding an SSL certificate to get HTTPS in WordPress is really cheap. In fact, most of you should be able to get an SSL certificate for free. At worst, an SSL typically falls into the $50 to $200 range. But that’s a small cost to pay to secure your WordPress site and protect your visitors.
WordPress is also free. So if you’re starting a new website from scratch, you won’t have to worry about paying anything to manage your site in WordPress. Between WordPress and the SSL certificate, the vast majority of you will pay $0 total for the two—and still be able to add HTTPS to your site.
The true advantages of adding SSL and HTTPS in WordPress really begin after the certificate has been installed.
You’ll experience fewer bounces, more traffic, and establish trust with your site visitors. HTTPS even helps boost your site’s rankings from an SEO perspective. Search engines like Google actually penalize websites that aren’t using HTTPS. Plus, internet browsers like Chrome, Firefox, and Safari go out of their way to warn visitors if they’re browsing a site that’s not secure.
SSL certificates are also a must-have for credit card processing. So you’ll be able to accept online payments and open the door to new monetization strategies for your WordPress site as well. Depending on the nature of your website, you’ll also have the opportunity to start collecting sensitive user data, like health or medical information via form fields.
The Bad
The biggest hurdle people face when adding an SSL and HTTPS in WordPress is the technical aspect. Lots of new WordPress users feel overwhelmed when using the platform. An SSL certificate isn’t something that comes standard when you sign up for WordPress, and it’s not something you can purchase directly through the platform either.
So you’ll have to get your SSL certificate from a third-party certificate provider and then add it to WordPress after.
First-time WordPress users might struggle a little bit with the interface. While WordPress is extremely popular and definitely my favorite way to manage a website, it’s not the most user-friendly tool on the market today.
Once installed, an SSL certificate and HTTPS don’t solve all of your site security concerns. As previously mentioned, this is just the bare minimum.
You need to make sure that you’re using a web hosting provider that can keep your website safe. This is especially true if you’re on a shared hosting plan. If another site on the same server you’re using gets hacked, it could compromise your website as well.
An SSL certificate doesn’t help secure your personal devices. So your WordPress site is still vulnerable if you aren’t taking steps to keep your home and work computers safe. Antivirus software and endpoint protection are required and completely separate from your SSL.
Security plugins are another way to add an extra layer of protection to your WordPress site. This will help eliminate potential threats and attacks that can’t be prevented with an SSL alone.
It’s also worth noting that the SSL certificate installation process doesn’t always go smoothly. Once you’ve installed the certificate, you still have to check for errors to see if some pages are referencing non-HTTPS elements. Fixing this problem can sometimes be a headache, and require the assistance of an IT professional.
Step 1 – Determine What Type of SSL Certificate You Need
Like most online products and services, SSLs aren’t really a one-size-fits-all offering. Most people don’t realize this, but there are actually several different types of SSL certificates that you can add to your website.
Generally speaking, there are five primary types of SSL certificates falling into two categories—validation level and secured domains.
We’ll take a closer look at these categories below.
Validation Level SSL Certificates
There are three different ways to separate SSL certificates by validation level—domain validated, organization validated, and extended validation.
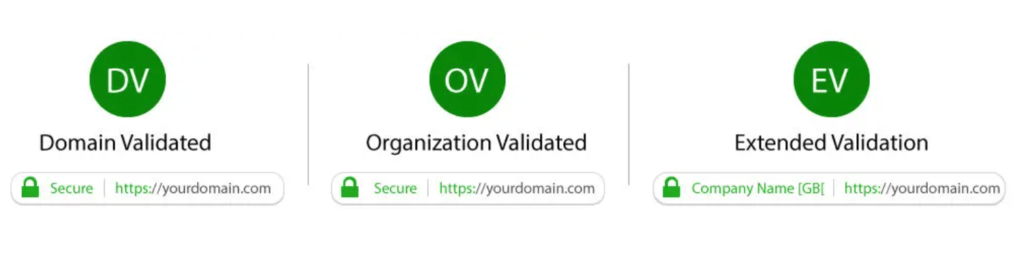
Here’s what you need to know at each one of these certificate types:
- Domain Validated (DV) SSL — DV SSLs have the lowest level of encryption. These are usually used for a small blog or some type of informative website. There aren’t strict requirements to obtain a DV SSL. The owner just has to prove they own the domain, which is usually accomplished by answering a phone call or responding to an email. You can typically get a DV SSL almost immediately.
- Organization Validated (OV) SSL — OV SSLs have a higher level of encryption and assurance than a DV SSL. The site owner’s information will be displayed in the address bar as well, which helps assure visitors that they’re not browsing on a malicious website. Getting an OV SSL requires a bit more in-depth validation process. The certificate authority has to determine if the site owner has the right to use the domain in question.
- Extended Validation (EV) SSL — EV SSLs offer the highest level of encryption, and therefore take the longest to get. In addition to the padlock displayed next to the URL, the company’s name will appear as well (as pictured in the image above). Websites that process payments, collect data, or handle user login information should use an EV SSL to ensure the highest level of security for visitors.
All three of these will add HTTPS to your WordPress site. It’s just a matter of determining which one is right for your needs.
Secured Domains
The scope of the three certificate types listed above might be limited. Your SSL won’t automatically secure your other domains and subdomains.
If you have subdomains and haven’t listed them on the original certificate, you need to understand the differences between single-name SSLs, wildcard SLLs, and multi-domain/SAN SSL certificates.
As the name implies, a single-name SSL only protects one subdomain. So if you get a certificate for www.example.com, the certificate does not apply to blog.example.com. If you have lots of different subdomains, a wildcard SSL certificate will be your best option.
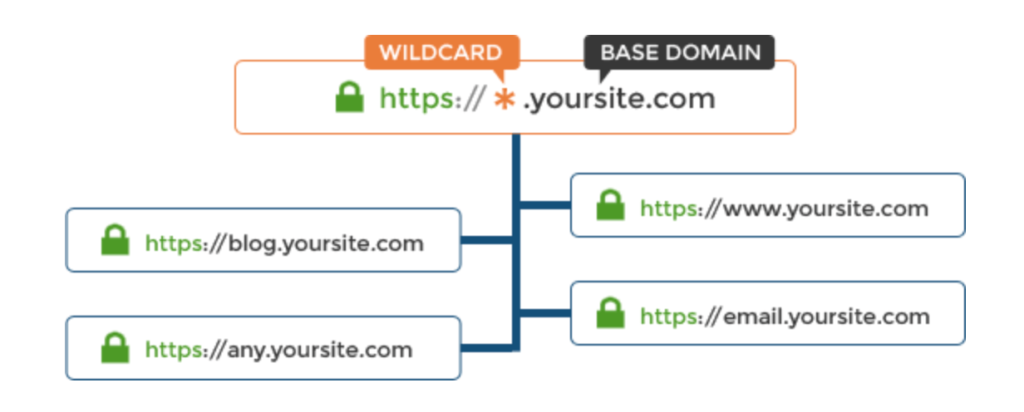
With a wildcard SSL, you can protect multiple subdomains with just one certificate.
Multi-domain SSLs let you secure different domains with a single certificate. Multi-domain SSLs are also referred to as SAN or UCC SSL certificates.
This is the best way to combine multiple hostnames on a single SSL, even if they aren’t coming from the same domain.
Step 2 – Get an SSL Certificate
Once you’ve figured out what type of SSL you need, it’s time to actually obtain one. There are a few different places that you can get an SSL certificate:
- Web Hosting Providers
- Certificate Authorities (CA)
- Website Builders
Getting an SSL from your hosting provider is the best option for most of you, and that’s my top recommendation. But I’ll explain each of these scenarios in greater detail below.
How to Get an SSL From a Hosting Provider
The best web hosting providers for WordPress offer a free SSL certificate. If you’ve already signed up for a hosting package from one of these providers, there’s a good chance you have an SSL and might not even know it.
If your hosting provider does not offer a free SSL, it’s usually an indication of poor hosting. Make the switch to a reputable provider, as they should all be offering you an SSL for free.
Bluehost is my top recommendation for new websites. It’s an affordable, reputable, and easy-to-use hosting provider. They offer WordPress-specific hosting and managed WordPress plans as well. As you’ll see in the next step, this makes it really easy for you to install and manage your SSL.
When you’re going through the checkout process and select your plan, you’ll see that a free Let’s Encrypt SSL has automatically been added to your cart.
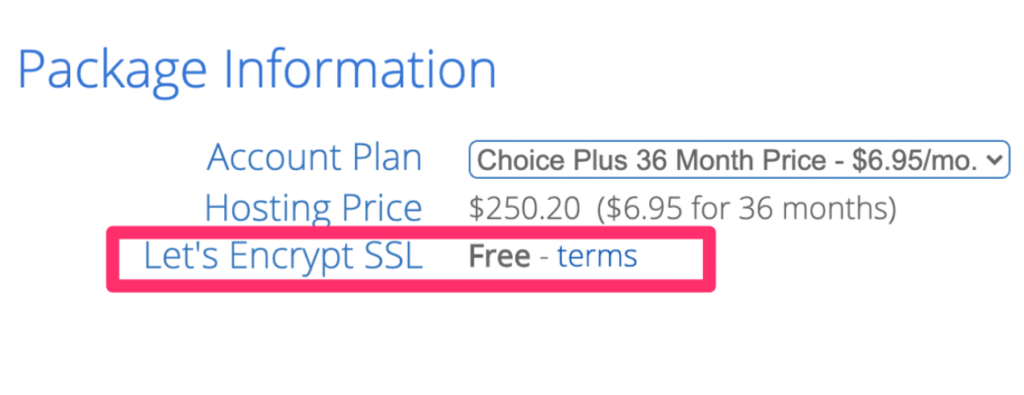
Other web hosting providers offer a free SSL as well. But for the purposes of this guide, we’ll continue to use Bluehost as our example.
How to Get SSL From a Certificate Authority (CA)
You can also get your SSL certificate directly from a certificate authority. Popular options include:
These are all viable options if you need to buy specialized SSL certificates, like wildcard SSLs or EV SSLs. But you’ll have to pay, and adding the certificate to WordPress isn’t as straightforward.
For most sites, getting a free SSL certificate from your hosting provider is a suitable option.
How to Get SSL From a Website Builder
Lots of website builders offer free SSLs as well. I’m referring to platforms like Wix and Squarespace.
However, those SSLs aren’t compatible with WordPress. Due to the incompatibility here, I won’t spend too much time on this section. You can’t install an SSL from a third-party website builder on your WordPress site.
Step 3 – Install the SSL Certificate
Once you’ve obtained an SSL, it’s time to enable it on your website. As mentioned before, I’m going to complete this process using Bluehost.
The exact steps and wording might be slightly different depending on your hosting provider. But the overall process and concept remain the same.
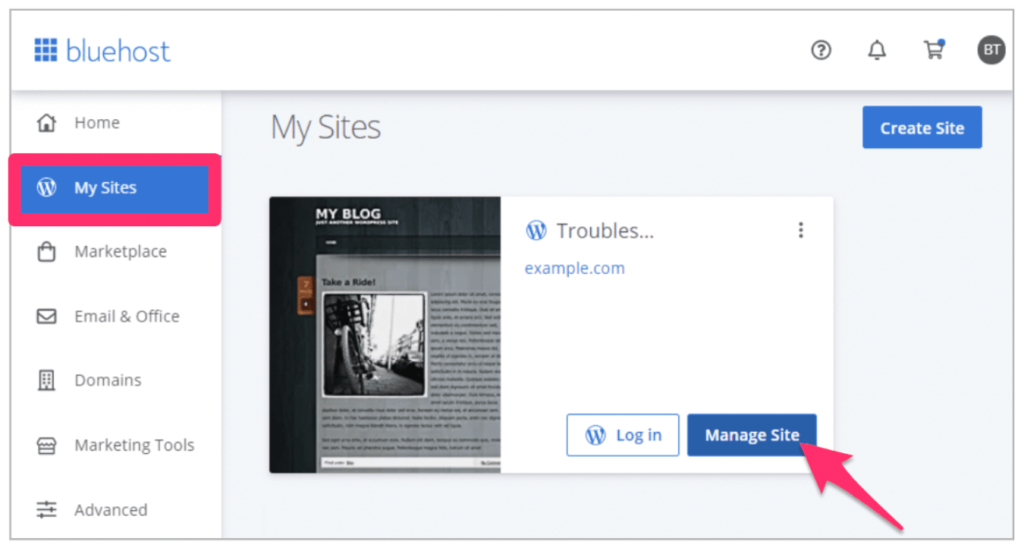
Go to Your Bluehost Dashboard
From your dashboard, navigate to “My Sites” on the left side of the screen. From here, locate the site you want to install the SSL on and click “Manage Site.”
Enable the Certificate
Head over to the security tab and then locate the “Security Certificate” section of the screen. From here, just make sure your SSL certificate has been enabled.
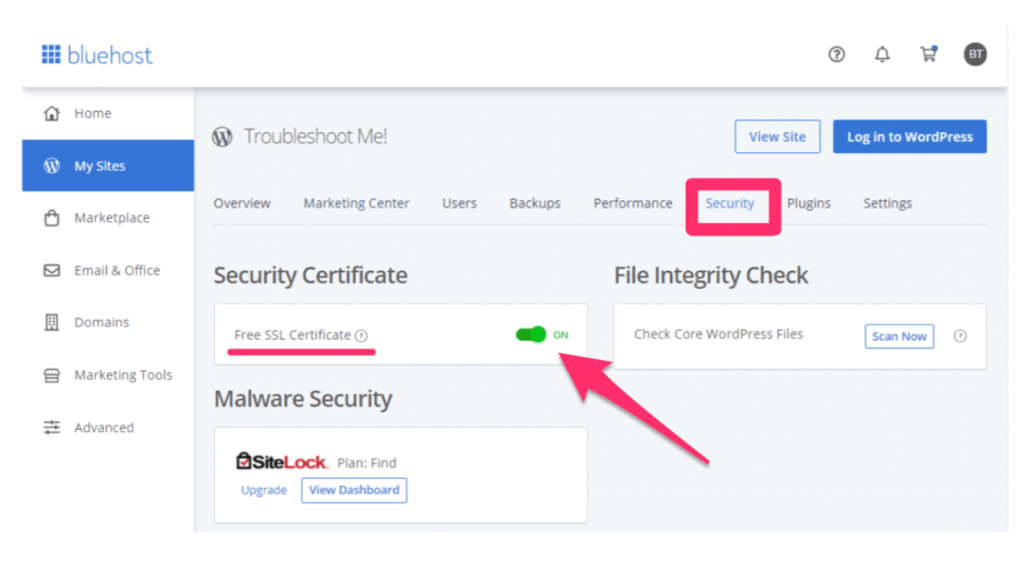
Again, your hosting provider might have slightly different phrasing or menus here. But that’s why it’s in your best interest to use a WordPress-specific hosting solution. You can add HTTPS to your site without having to go through a complex manual installation process in WordPress.
Step 4 – Verify the Installation
Once enabled, the SSL won’t necessarily be activated immediately. So if your site still says “not secure,” give it a few hours for the certificate to completely install.
But once a sufficient amount of time has passed, it’s time to make sure the certificate has been activated, and your WordPress site is officially on HTTPS instead of HTTP.
So use different website browsers and navigate to your site. Click on the lock to verify the connection. In some instances, your WordPress site might have the SSL installed and be using HTTPS, but you could still have a problem. Here’s an example of a mixed content error:
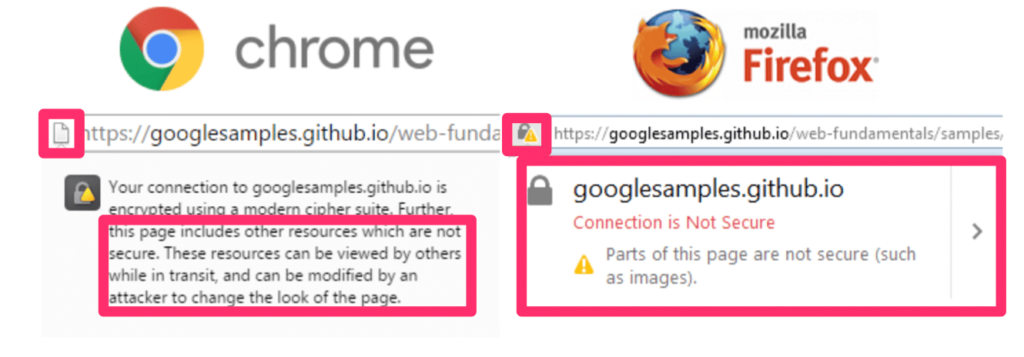
This occurs when a web page references non-HTTPS elements. Fixing this can sometimes be a challenge, and you may need to consult with an IT professional for assistance.
These types of errors are less likely to occur if you’re using a hosting provider like Bluehost to install your SSL. A manual installation by a beginner will be more susceptible to problems.
Step 5 – Notify Google
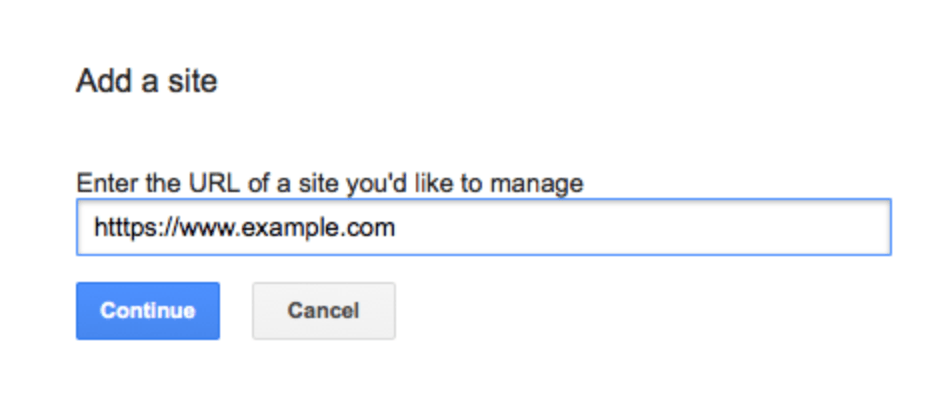
Rather than waiting for Google to index your site, you should be proactive and let them know that you’ve moved to HTTPS.
Google Webmaster Tools will treat HTTP and HTTPS as two separate websites. So you’ll need to add your new HTTPS URL to the sitemap in your Google Search Console.
Doing this immediately ensures that your site gets the SEO benefits of HTTPS.
A slight decline in the page rankings is actually normal right after the switch. But once all of your content has been re-indexed, you can expect your WordPress site to get a bump in search rankings from its previous positions.