We recommend you migrate your website to Bluehost, our top-recommended web host. Sign up today for just $2.95 per month.
The web hosting provider you choose has more of an impact on the way your site runs than you may realize. One thing your web hosting affects is site speed which has a knock-on effect on your search engine rankings. It also impacts security and the ease with which you can back up your site. Plus, there are limits on file storage and the amount of traffic you receive. If you’re struggling in any of these areas, you may wish to migrate your website to a new web host.
Whatever the reason for your switch to a new host, we’ll guide you through the process covering every little step so that even those who aren’t familiar with the backend of a website can migrate their site successfully.
The 11 Best Web Hosting Providers for Migrating Your Website
You’re about to see that migrating your website to Bluehost is ridiculously simple. But we know there’s no one-size-fits-all web host.
If you’re unsure which hosting provider to migrate to, check out our list of the top web hosting companies. Here’s a quick rundown of the top 11 web hosts you may want to migrate to:
- Bluehost – Best overall
- HostGator – Best for affordable scalability
- Web.com – Best website builder for beginners
- Hostinger – Best for long-term pricing
- DreamHost – Best for WordPress sites
- SiteGround – Best for ecommerce sites
- ScalaHosting – Best customer service
- GreenGeeks – Best for eco-friendly hosting
- WPEngine – Best managed WordPress hosting
- A2 Hosting – Best shared plans for site speed
- InMotion – Best for technical users
Migrate Your Website to a New Web Host in 8 Easy Steps
Follow these essential steps to complete the migration process error-free:
- Sign Up for Bluehost
- Transfer Files Using FTP
- Export Your Database
- Transfer Your Database
- Configure Settings
- Transfer Any Custom Email Addresses
- Update Your Domain Name Server (DNS)
- Carry Out a Website Test
Step 1: Sign Up for Bluehost
Not so tech-savvy? Bluehost has a free migration service in which they take care of the entire transfer for you.
This service is available for WordPress websites, and it’s free when you sign up for shared hosting with Bluehost.
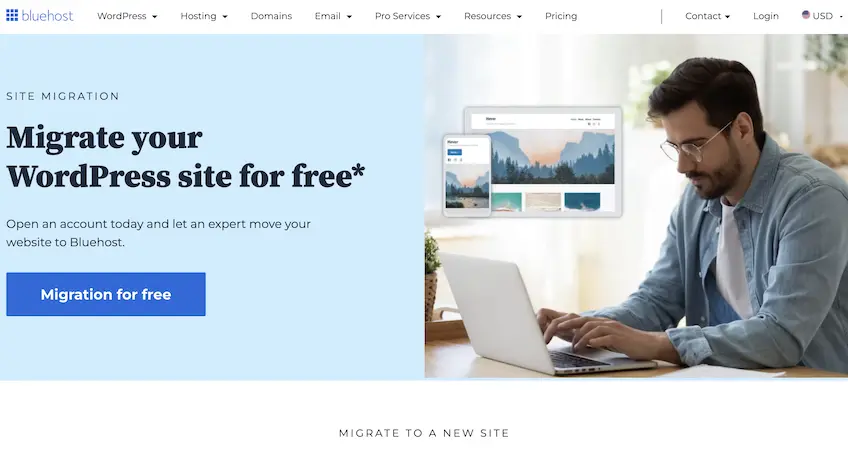
To get started, select your new hosting plan from Bluehost and create an account.
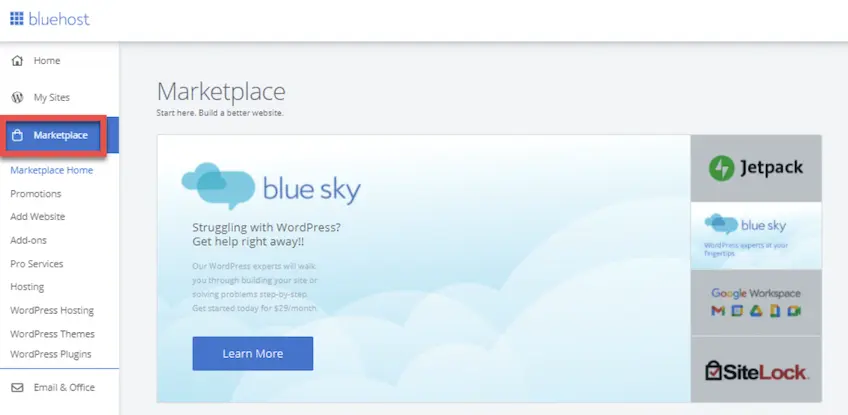
- From there, go to the Bluehost Marketplace on the left side of your account dashboard and navigate to Migration Services.
- Enter your website’s name, and Bluehost will run a quick compatibility check.
- Assuming the compatibility check was successful, you can now install the Bluehost Site Migrator plugin.
Once the plugin has been installed and activated, the Bluehost experts will take over. Fully completed transfers take two to three days. You’ll be notified when the migration is complete and have an opportunity to review everything before finalizing the site transfer.
You’ll also need to point your DNS to the new site, which Bluehost will help guide you through.
Bluehost support is available 24/7, so you can rest easy knowing that you’re in good hands before, during, and after the migration process.
If you’d prefer to migrate your website manually or are migrating to a host that doesn’t offer a migration service, continue with the following steps.
Step 2: Transfer Files Using FTP
Transfer files from your old host to your new one so that your themes, integrations, plugins, content, and so on move across. Many hosting providers will have the option to backup files from within the control panel, which you can then download and save.
From your existing host’s control panel, go to Files > Site Backup & Restore then click Full cPanel Backup, select the files and saving format, then download.
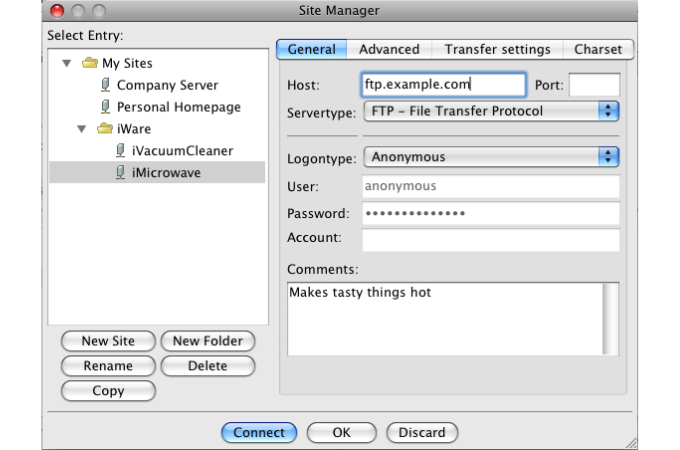
If not, you’ll need a File Transfer Protocol (FTP) client. The most widely-used free FTP client is FileZilla. Here’s how to use it to transfer files to your new web host:
- Download FileZilla and open a new window on the program using your FTP credentials from your old host—host, username, password, and port. Find these credentials on your hosting dashboard.
- Select all files in the window, right-click, and choose Download to export these files and save them to your computer.
- Open a new window with FileZilla and log in using your new FTP credentials from your new host’s dashboard. Select and drag your files from your computer to the new window to start the upload.
Step 3: Export Your Database
First, figure out if your site has a database or not. Sites with dynamic web pages that display different content to different users, based on behavioral tracking for example, along with sites that allow comments and other user-generated content will have a database. Whereas sites with web pages that mostly remain the same, i.e. static web pages, most likely don’t have a database.
The majority of hosting providers use a MySQL database that you can export with an app called phpMyAdmin. Find both within your existing host’s control panel. Follow these instructions to export your database:
- Navigate to the Databases section of your cPanel then click on the phpMyAdmin app.
- Select your database from the left-hand column. Click the Export button in the main menu. Then click Go.
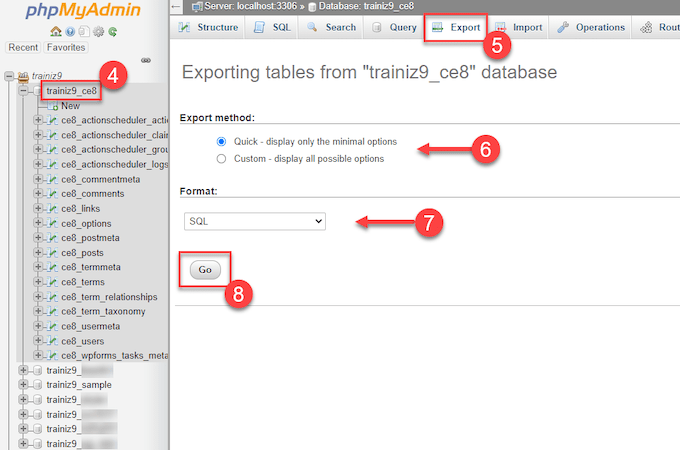
Your database is now saved to your computer, ready for upload to your new hosting provider.
Step 4: Transfer Your Database
You’ll need to set up a blank database within your new host before you add your existing database. Here’s how to do both:
- Navigate to Databases then MySQL Databases in your new host’s control panel.
- Create a new database and admin account for this database.
- Return to Databases and click the phpMyAdmin app. Find your new database in the left-hand column and select it.
- Select the Import button in the main menu at the top then Choose File. Click on your database within your local computer’s files.
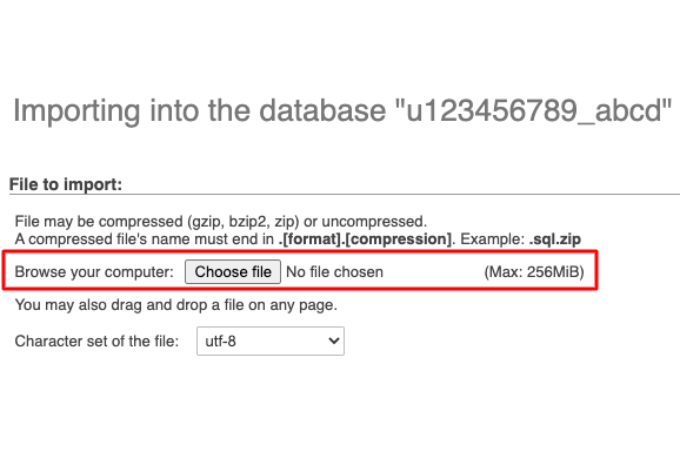
- Leave any other settings unchanged. Click Go.
Step 5: Configure CMS Settings
If you’ve transferred files and a database, you’ll need to configure files so they point to the new database instead of the old one. The way you approach this depends on which CMS you use. However, in most instances, you just need to edit a few lines of code within the configurations or settings file of your CMS.
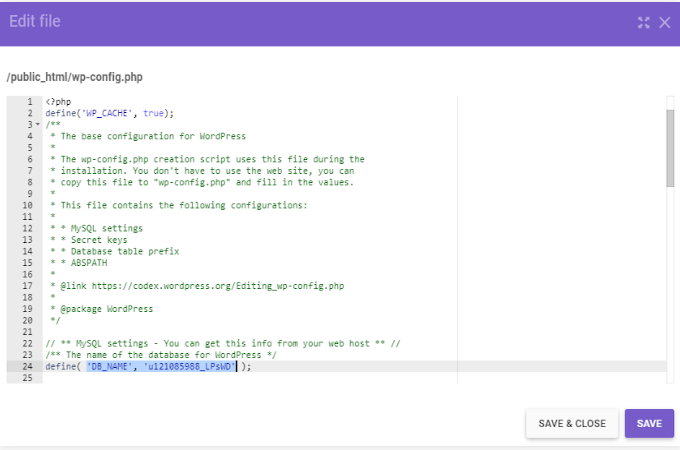
Here’s what to do if you use WordPress:
- Navigate to the wp-config.php file, which can typically be found by going to Files > File Manager and then clicking on the public_html folder.
- Use control + F to find the code for your database information and update it to show your new details next to DB_NAME, DB_USER, DB_PASSWORD, and DB_HOST.
Step 6: Transfer Any Custom Email Addresses
You likely have custom email addresses set up for your website via your old hosting provider, e.g., info@skaccounting.com or jenny@skaccounting.com. When you migrate your website to a new host, you’ll need to set up these email addresses with the new host, too. If you don’t take care of this you may miss important emails from leads, clients, and so on.
Thankfully, this process is very simple to do. Go to your new cPanel and find the email section. Add new email accounts with the same addresses as the previous ones and your email addresses will be transferred to your new host.
Note the following details from your old account: email address, password, and mail server (IMAP). You should be able to find this in the settings of the email section on your old dashboard.
Step 7: Update Your Domain Name System (DNS)
DNS is what matches the domain name of a website to its corresponding IP address, a long string of numbers that instructs a web browser where to go to load a page when somebody enters a website address. This is the last item you need to transfer to successfully migrate your site.
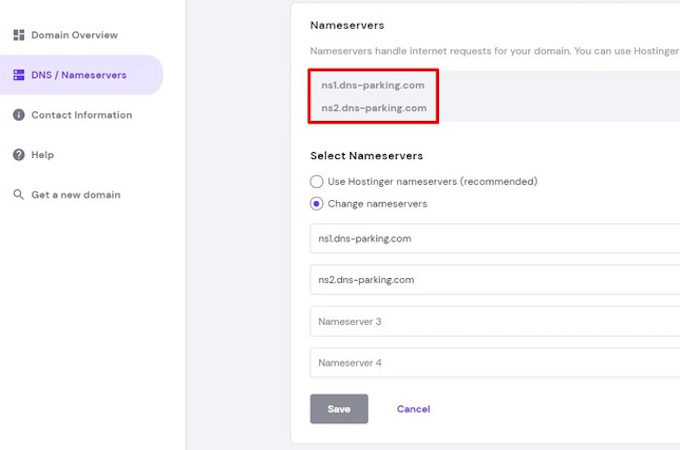
Your domain name must now point to the new host’s server instead of the old one. Here’s what you need to do:
- Find the nameservers for your new host in the general info/account details section of the control panel or your welcome email. They look something like ‘ns1.host.com’ and ‘ns2.host.com’.
- Go to your domain registrar and locate the section with the domain nameservers settings. They will likely be found in a domain management section or similar. Input your new domain nameservers.
- Go to your new hosting account and make sure its nameservers are set as the default.
The transfer should be complete in up to 24 hours. Your hosting provider will likely tell you if the domain name isn’t pointing to the right server on its dashboard.
Step 8: Carry Out a Website Review
Once your DNS settings are successfully updated, you must ensure your website is functioning correctly on your new host. Even the smallest of details can impact user experience on your site. This is important as user frustrations make visitors more likely to leave and not come back to your business (or blog etc.)
Access your website by entering your domain name into your web browser as normal. Then you can browse your site, checking if elements look correct and are functioning properly. It’s also a good idea to check everything is working on different types of devices. Send test emails to your migrated email accounts. And test important web forms such as signup and contact forms.
Perform a health check for your website using a tool such as Ahrefs’ Site Audit.
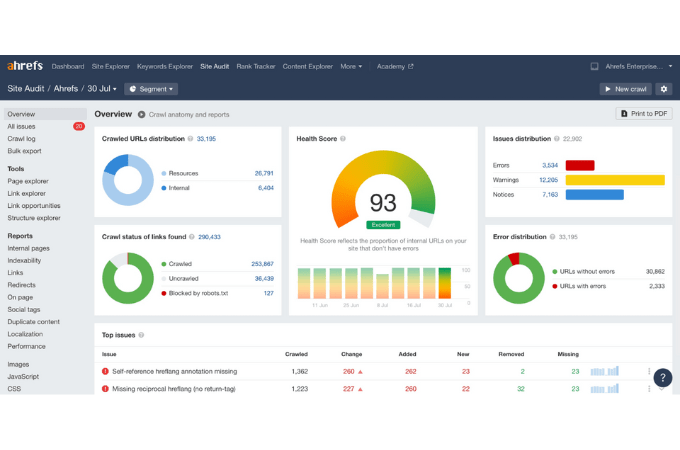
This will alert you to any issues with your site that may not have been there previously, such as:
- Broken links
- Duplicate pages
- 404 pages and other page errors
- Page speed
- Internal linking issues
- Tagging issues
- CSS and HTML issues
- Redirect chains and more
Final Thoughts About Migrating Your Website to a New Web Host
If you aren’t happy with your current web host or find a better deal, you may wish to transfer your website over to a new hosting provider. Choose a web host that offers the right features and storage limits for you at a reasonable price point. You may not need to migrate your website manually if your new host offers a migration service. For example, Bluehost does it for free upon request.
If you must migrate your website manually, it’s a matter of transferring any files, databases, and custom email addresses over. This means that any plugins, content, dynamic pages, themes, and so on move to your new web host. When the job’s done, be sure to review and test your website for any errors as the on-site user experience is of the utmost importance.