We recommend that most people use WordPress with Bluehost because it’s easy to set up, and there are no limits to what you can do. Get started with Bluehost today for just $2.95 per month.
Beauty is one of the most popular niches for content creation. For years, bloggers and vloggers have succeeded in a saturated niche as the demand for new beauty content continues to rise. So, it follows that if you’re interested in starting a beauty blog, you’re making a smart choice.
However, given that it is such a popular niche, you must also be strategic about how you start your blog and plan content. In this guide, we’ll break down the steps you need to take to do successful market research and start a beauty blog that has a chance of standing out in a competitive landscape.
The 5 Best Best Blogging Platforms For Starting a Beauty Blog
When starting a blog, you’ll need to use a good blogging platform with good pricing and intuitive features. We’ve put together a list of our top picks based on how beginner-friendly and feature-rich they are:
- WordPress with Bluehost – Best Overall
- Wix – Best for Beginners Building a Professional Blog
- Squarespace – Best Blog Builder for Artists and Designers
- LinkedIn – Best for Networking
- Medium – Best for Writing to a Built-In Audience
To find out the pros and cons of each platform in detail, read our full review of the best blogging platforms.
Start a Beauty Blog in 9 Easy Steps
Starting any blog involves a mix of technical steps and research, but with a niche as competitive as beauty, you need to be intentional when setting up your site to get traffic. In this guide, we’ll break down the nine steps you should take to set up a beauty blog that has a chance of success without becoming overwhelmed by the process.
- Sign Up For Bluehost
- Get Organized
- Choose a Domain Name
- Set Up Your Social Media
- Choose A Theme
- Add Plugins To Your Site
- Set Up Google Analytics
- Write Your First Few Posts
- Officially Launch Your Blog
For the purposes of this tutorial, we’ll be using Bluehost with WordPress because it’s beginner friendly and doesn’t have much of a learning curve. It already has WordPress connected, making the technical side of setting up a blog easier, which gives you more time to focus on the research and writing. You can get started with Bluehost today for just $2.95 per month.
Step 1: Sign Up For Bluehost
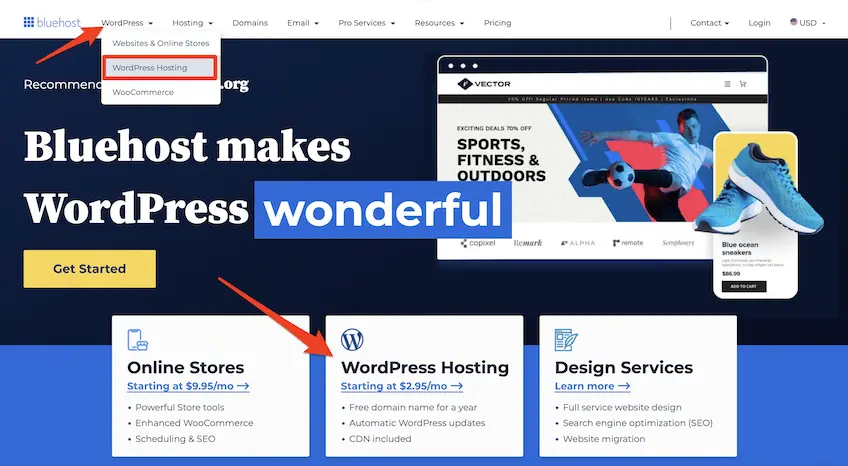
Before doing anything else, you must sign up for Bluehost as your blogging platform.
Head over to Bluehost’s website, and then navigate to WordPress Hosting. This can be accessed from the top-level navigation menu or directly on the page.
Scroll down and select a plan that works best for you. Starting with the Basic plan for $2.95 per month is fine for most bloggers. It’s affordable, and you can always upgrade in the future.
Once you’ve selected your plan, add it to your cart. You then need to select your hosting period.
The lowest rate per month starts with 12 months. However, you’ll actually save more money over time if you sign up for 36 months. Your cost per month will be slightly higher, but it pushes off the renewal rate and locks you into a promotional deal for longer. Just make sure you do at least 12 months to secure your free domain.
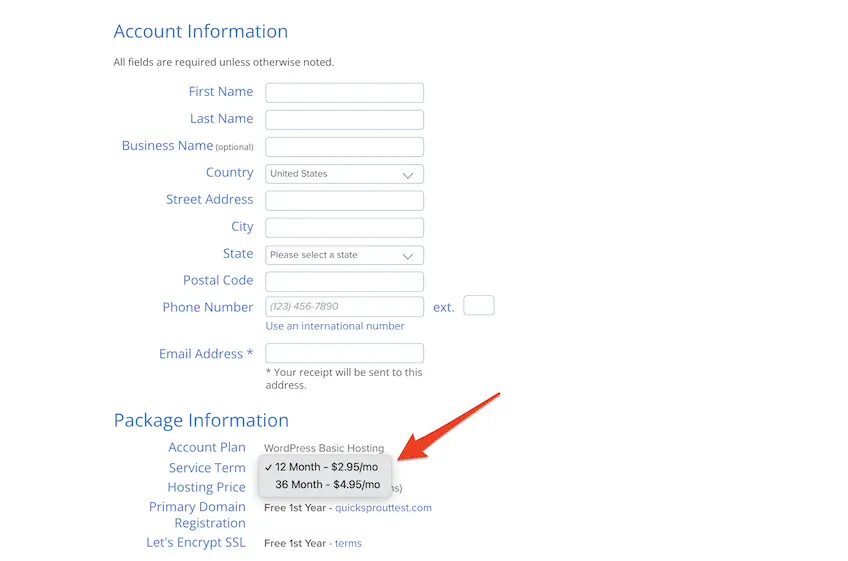
From there, you can finish the account creation by filling in your details.
Add your payment details and finalize your dashboard. You can then go to your hosting dashboard to view your new account.
Step 2: Get Organized
Before you actually get started with your blog, you need to do some market research. Beauty is a very competitive niche in the blogging and vlogging world.
Unless you have a clear idea of your target audience and what type of content you’ll create, you will struggle to succeed or get noticed. Before you do anything, make a list of your favorite beauty blogs and make notes on what you like. What makes them so appealing? Why do you keep coming back? How do they structure their content?
Then, do some research into your niche and target audience. What kinds of people will consume your content? Who is going to be interested in natural makeup or drugstore products (or whichever niche you choose)? Where do those people hang out, shop, and look for new trends?
Once you’ve gotten clear on who will read your blog and how you will market your content to them, you’re ready to move onto the technical stages of starting a blog.
Step 3: Choose a Domain Name
Your domain name is going to be the same as your blog name. When choosing one, you want something memorable and related to your niche that your audience can easily find and one that can’t be reported for copyright infringement.
Here are some key things you want to keep in mind when choosing a domain name:
- Is your domain relevant to your niche?
- Will people be able to spell it easily?
- Is it memorable?
- Is it unique?
- Is it available on social media as a handle?
When in doubt, sometimes the best strategy is to combine your name with a beauty term to keep it relevant, personal, and unique. For example, if your name is Jane, you could use the domain: janeMUA.com.
Once you’ve decided on a domain name, you can search for it on Bluehost during the WordPress hosting signup.
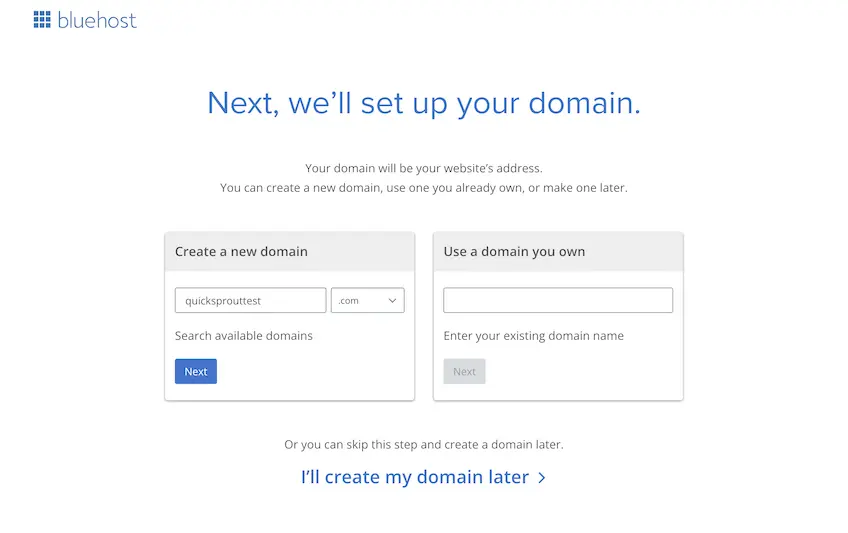
This is the only way to claim a free domain from Bluehost. If you navigate straight to the domains page, then you’ll have to pay for the registration.
But if you secure a domain when signing up for web hosting, you’ll get the first year for free.
If you haven’t thought of a good domain yet, that’s ok. You can skip this step now and set it up later.
Step 4: Set Up Your Social Media
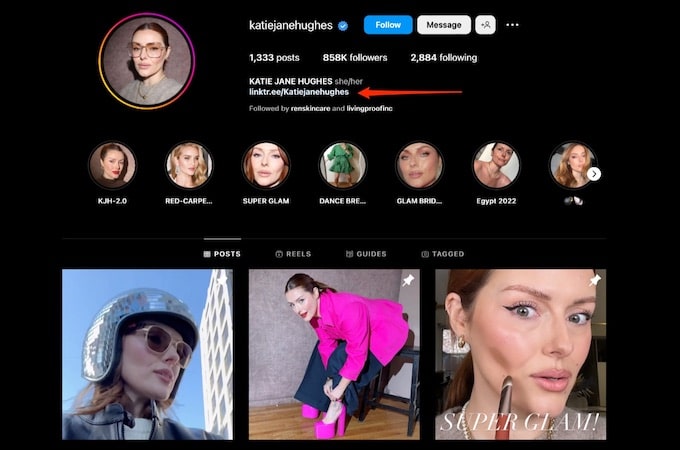
Once you’ve chosen a domain name, you can secure social media handles. Even if you’re not ready to launch your blog, you’ll want to claim your name so no one else can take it.
Social media platforms let you set up a business account for free if you’re a blogger, where you’ll get access to a suite of business tools like analytics and post links. These can be great for measuring how much traffic is coming to your site from socials and setting up future partnerships with brands.
You can add your site directly to your bio as a link and even add a coming soon post with some branded hashtags if you want to build a little suspense while setting up your blog.
Step 5: Choose A Theme
Once you’ve chosen a name for your site, you can set it up in Bluehost. This includes selecting a theme.
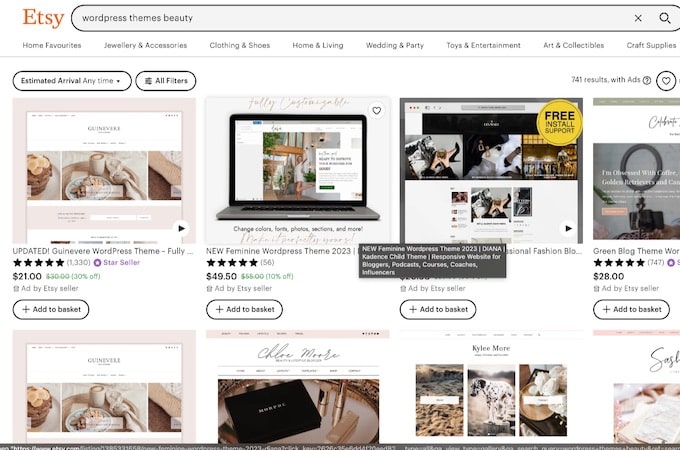
You can use one of the free themes offered by Bluehost, or you can get your own from a different source. For a beauty blog, people will care about the aesthetic and the overall look of a blog in a way they wouldn’t if it was a business or finance blog.
If you don’t like the Bluehost themes, I recommend using a third party like Etsy or Hello You Designs to get a theme because even though you will have to pay a little for them, you won’t need to deal with any complicated coding, and you’ll have a beautiful, unique site that your audience is excited to visit.
Etsy has very good WordPress themes for low prices, so this is your best bet if budget is an issue. Otherwise, a boutique site will offer you more in the range of customer support and better designs.
Either way, your designer will give you a set of instructions when you purchase your theme that will explain how to import and edit the theme. Usually, it’s as easy as downloading the theme, then going to Appearance in your WordPress dashboard, then Themes, and then uploading your theme.
Your theme will also come with some copy, but it’s usually gibberish. You’ll need to add your own writing, including your home page content, about page info, and copy for your blog pages and menus. You can take inspiration from other sites to help you write your content, but do not copy and paste! Plagiarism is serious and could get your blog shut down.
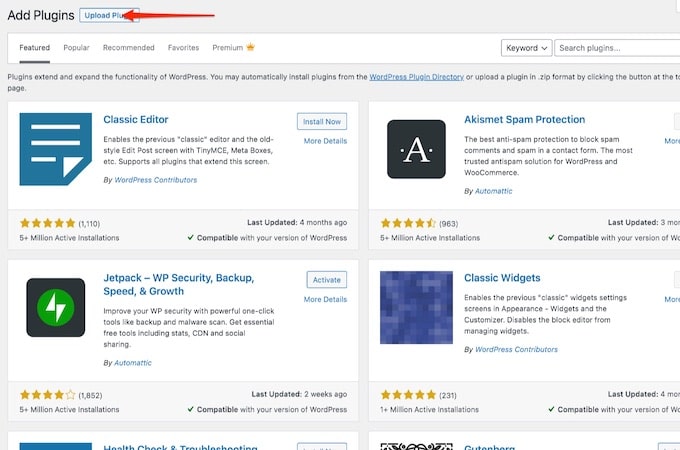
Step 6: Add Plugins To Your Site
Before launching your blog, you should get your plugins uploaded and activated.
Plugins are tools you add to your WordPress site that complete tasks or help solve problems, like speeding up your site or removing spam comments. There’s no set rule as to which plugins you should include, but a few are essential.
WordPress will usually activate these essential ones for you, and your theme may come with added plugins to run certain features, like social media banners. But if you don’t have any added or uploaded, these are the main ones I suggest you use:
- A cache plugin like WP Fastest Cache.
- A spam blocker like Akismet Anti-Spam
- A backup plugin like Updraft
- An SEO optimization plugin like Yoast SEO
- A compliance plugin like Ibuenda to help you create a privacy policy and cookie notice
You can add any other plugins you like but make sure you read the reviews before adding them so you’re not clogging up your site with slow-loading plugins or ones that may cause glitches. Other plugins you might want could be social media share buttons, adding an Instagram carousel to your site, a better contact form, and more. Review the options available and see what you like.
Step 7: Set Up Google Analytics
Before you launch your blog, you should set up Google Analytics for your site.
This will help you keep track of your traffic, including what demographic is visiting your blog and how they are finding you.
You need a Google account to set up analytics, preferably one you’ll use to run your blog. After that, all you need to do is go to Google Analytics and sign in. Then, you need to fill in all the details about your site, including your industry, website name, URL, and time zone.
You’ll then be given a tracking code to copy and paste into your site.
The easiest way to do this is by downloading the MonsterInsights plugin. If you go to Plugins under Appearance in WordPress, you can easily find and install the plugin. Once you activate the plugin, all you need to do is fill in some details and connect Monster Insights to your Google account.
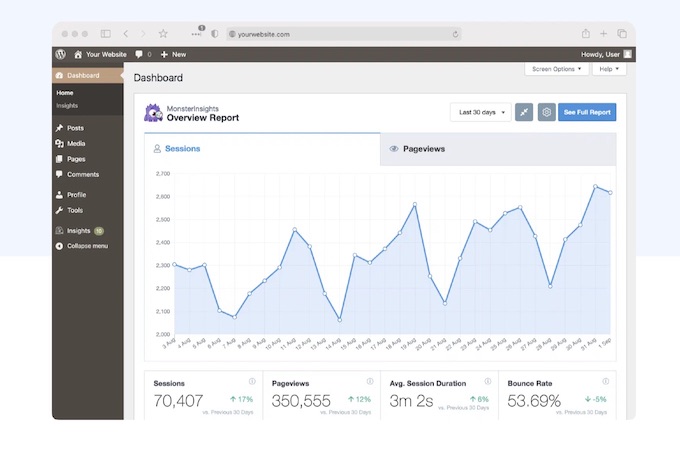
It will then connect your Google Analytics to your site so you can start tracking data from traffic and website visitors.
Step 8: Write Your First Few Posts
Finally, before you launch your blog, you need to have some content ready.
While there’s no set rule as to how many posts you should have ready, people generally start with five or more because a big part of growing a blog and improving SEO is being able to keep people on the blog and move them from post to post.
The more content you have, the longer people will stay on your site, which is good for your traffic, and, if you host ads on your site, your revenue. A good strategy for keeping people on your site longer is to have posts that link to each other.
For example, if you write one post about your top five favorite mascaras, your next post might be about your favorite makeup removers. You can then link these posts together, so readers have a natural journey when they move through your posts.
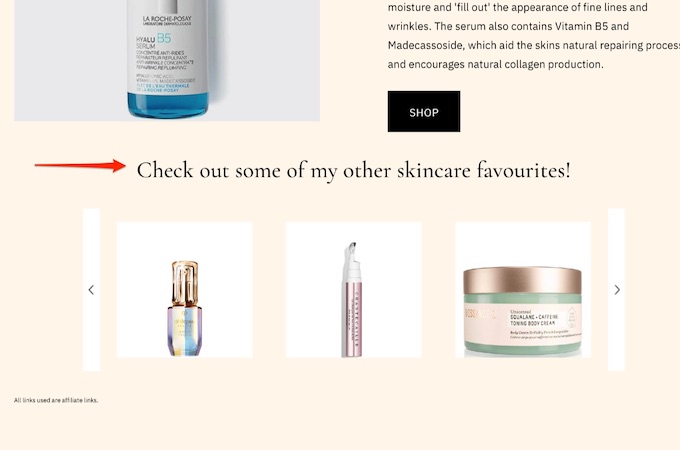
Plan out at least five posts and write the content. It doesn’t matter how long this takes, but you do need to add high-quality pictures. With some blogs, this isn’t a big deal, but for beauty blogs, visuals are essential. Don’t forget that you will be competing with Youtube and TikTok beauty gurus as well as other bloggers.
Don’t forget to insert your personality into your posts. Beauty is a saturated niche, so your personality and voice will keep people coming back to your blog.
Step 9: Officially Launch Your Blog
Once you’ve finished creating content and uploaded it to your site, you’re ready to officially launch your beauty blog.
It’s not easy to get traffic to your site initially because you will have to wait a few months before seeing any results from SEO or search engines. However, that doesn’t mean you won’t get any traffic; it just means you’ll have to look for it from other sources.
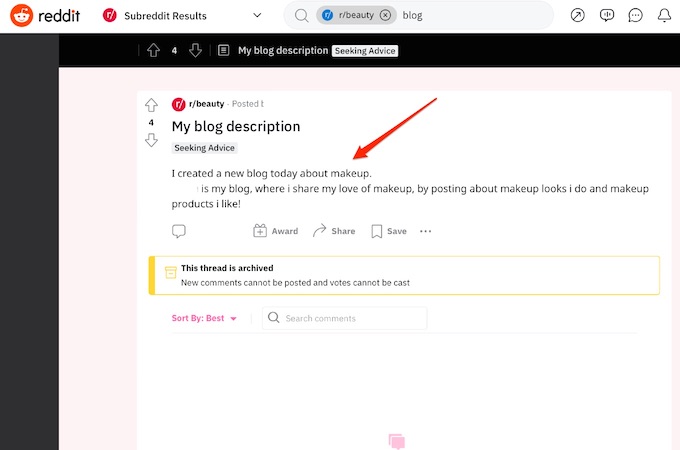
Launch your social media and start posting about your blog and directing people to it. Share posts in Facebook groups or Reddit communities to get some attention. Ask your family and friends to share posts so you can reach a bigger audience.
Then, sit back and focus on writing great content while your traffic grows.
Final Thoughts About How to Start A Beauty Blog
If you follow this guide, it should be easy to set up a successful, profitable blog in no time. Starting a beauty blog can feel intimidating with all the competition, but with the right steps and tools, there’s no reason you can’t succeed in one of the most popular niches.